How to Tie a Nail Knot for Fly Fishing: A Canadian Beginner’s Step-by-Step Guide
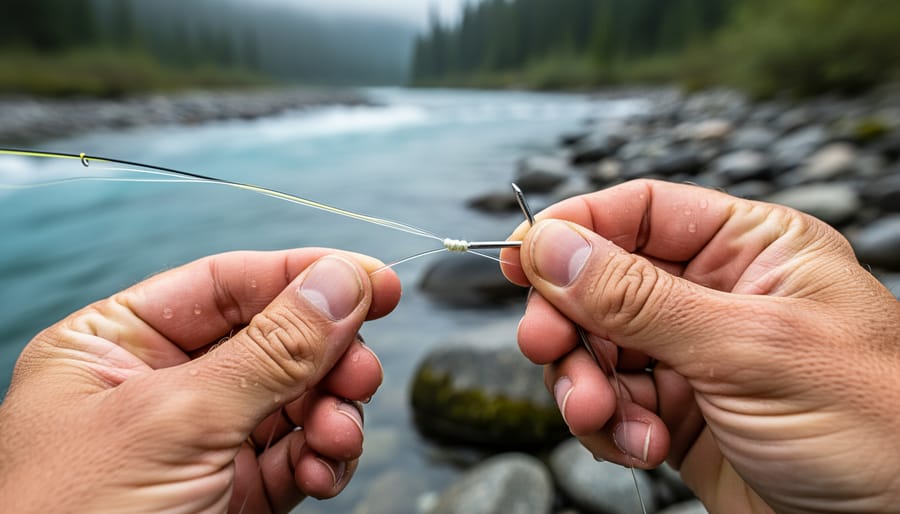
The nail knot is your go-to connection for attaching a leader or backing to your fly line when there’s no loop at the end, and it’s widely considered the strongest, sleekest option available. This small, streamlined knot passes through your rod guides without catching, which matters when you’re bringing in that Lake Ontario salmon or fighting a feisty brook trout in a northern stream. You can tie a secure nail knot in about five minutes once you’ve practiced the technique a few times, though your first attempt might take a bit longer.
I’ll be honest: the first time I tried tying a nail knot on the banks of the Bow River, I fumbled through it and ended up with something that looked more like a tangled mess than a fishing knot. But here’s the thing about this particular connection. Once you understand the logic behind it, the wrapping pattern, and the tightening sequence, it becomes second nature. I’ve since tied hundreds of them, and the confidence you gain from mastering this skill carries over into the rest of your fly fishing for beginners journey.
This guide will walk you through everything you need to know: the materials you’ll gather, the exact steps to follow, and the common mistakes to watch for. By the end, you’ll tie a nail knot that holds strong through countless casts and hard-fighting fish.
Why the Nail Knot Is Essential for Your Fly Fishing Setup
When to Use a Nail Knot vs. Other Connections
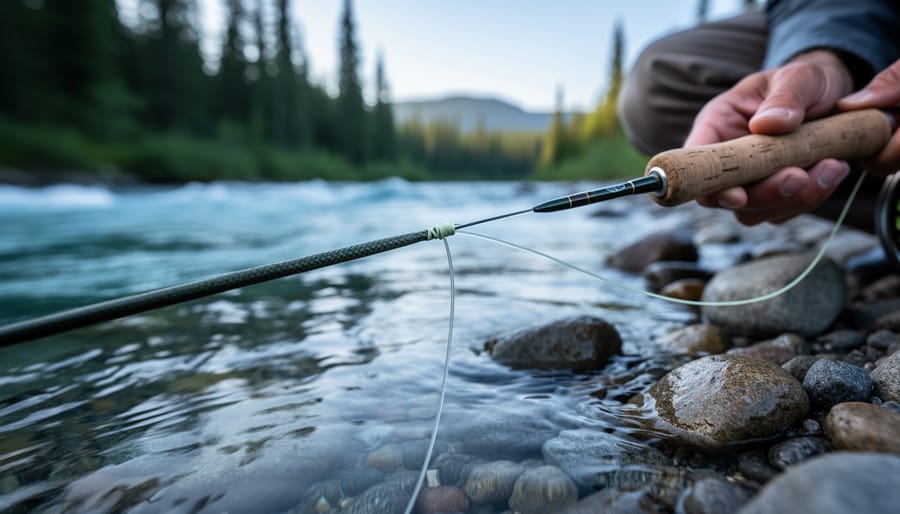
You’ll reach for a nail knot in three specific situations. First, when your fly line doesn’t have a factory-welded loop at the end, common on older lines or budget-friendly options, the nail knot becomes your go-to permanent connection for attaching leaders or backing. Second, if you’re deliberately choosing a streamlined setup over loop-to-loop connections, the nail knot’s slim profile glides through rod guides without catching, which matters when you’re fighting a big northern pike in Saskatchewan’s Tobin Lake or chasing lake trout in Alberta’s mountain reservoirs. Third, targeting larger, powerful species often calls for the confidence of a smooth, strong connection that won’t create a hinge point.
Loop-to-loop connections, by contrast, offer convenience and easy leader changes. They’re brilliant for anglers who swap leaders frequently or prefer quick rigging on the water. But they create a small bump where loops interlock, and that bump can snag in guides during a long run. Some experienced anglers also prefer nail knots to avoid loop-to-loop limits when chasing trophy fish across Canada’s expansive waters. Neither option is wrong, it’s about matching the connection to your fishing style and conditions.
What You’ll Need to Tie a Nail Knot
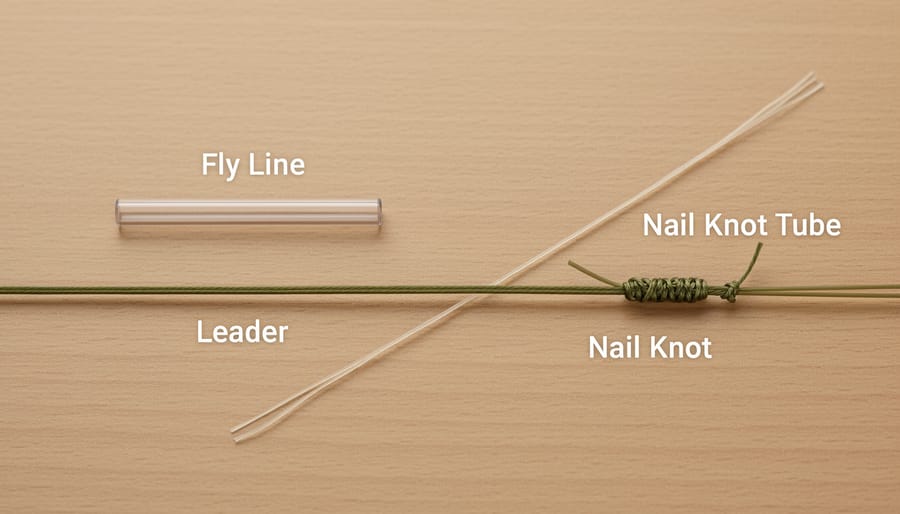
The beauty of the nail knot is that you don’t need specialty tackle to tie it, just a few simple items you probably already have around the house or in your gear checklist. I learned this knot on a riverbank in British Columbia using a coffee stirring straw and whatever line was already on my reel, and it worked perfectly.
Here’s everything you’ll need to get started:
- Your fly line, the thick, colored line already spooled on your reel
- Leader or backing material, monofilament leader for connecting to your tippet, or braided backing for connecting to the reel arbor
- A hollow tube or drinking straw, provides a channel to thread the tag end through; a standard plastic drinking straw, coffee stirrer, or even a hollow pen refill works great
- Lubricant (optional but helpful), a bit of saliva or line dressing helps the knot tighten smoothly without friction damage
- Sharp scissors or nippers, for trimming tag ends cleanly once the knot is set
Most Canadian fishing shops like Cabela’s or local fly shops carry leader material and backing in various weights. Start with 20-pound monofilament leader if you’re targeting typical trout and salmon species across Ontario or Alberta waters. The straw you need is genuinely just a regular drinking straw, nothing fancy required. Grab one from your kitchen drawer or ask for an extra next time you’re getting coffee before hitting the water. Straighten both your fly line and the leader material as much as possible before you begin, which makes the wraps easier to control and keeps everything neat during the tying process.
Before You Start: Preparation and Safety Tips
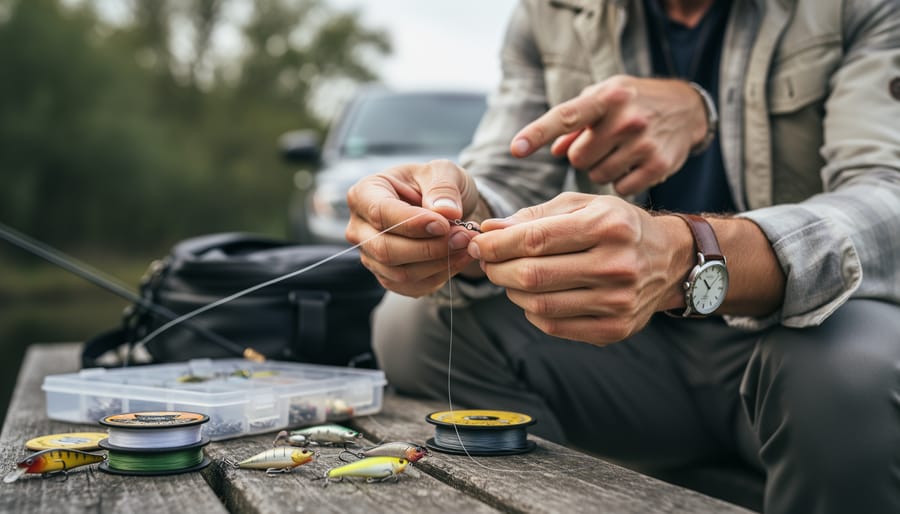
Before you sit down to tie your first nail knot, a few simple preparation steps will save you frustration and help you build a connection that actually holds. I learned this the hard way on a chilly September morning in northern Ontario, fumbling with curled monofilament and dim light until I finally gave myself the setup I should have started with.
Start by straightening both your fly line and your monofilament leader or backing material as much as possible. Coiled or kinked line fights you at every step, making it harder to create neat, even wraps. Run the monofilament between your fingers a few times with gentle tension, and smooth out any memory curves in the fly line end. This small step makes the entire tying process smoother.
Choose a well-lit workspace where you can clearly see each individual wrap as you create it. The nail knot relies on precise, tight coils, and you cannot judge your work properly in shadow or fading evening light. If you are tying this streamside, position yourself so the sun or your headlamp illuminates your hands directly.
If you plan to trim tag ends after tightening, keep sharp scissors or nippers within reach but away from the working area until you need them. A stray snip mid-tie can end your attempt instantly.
Set realistic expectations for your first few tries. Most anglers need three or four practice knots before they produce one they trust enough to fish with. That’s normal, not a reflection of your ability. Grab extra leader material, find a comfortable spot, and give yourself permission to learn through repetition.
Step-by-Step: Tying the Nail Knot
Positioning the Fly Line and Leader
Start by laying out your fly line on a clean, flat surface where you can see what you’re doing. Slide your hollow tube or straw alongside the fly line, positioning it so the tube extends about an inch past the end of the line. This gives you enough working length without excess material getting in the way.
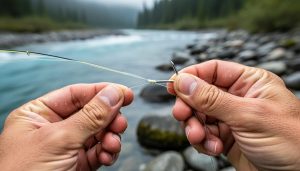
About an inch back from the tip of your fly line, use your thumb and forefinger to pinch both the line and the tube together firmly. This pinch point becomes your anchor for the entire knot, so hold it with steady pressure. Now take the thick butt end of your leader material and lay it on top of the fly line, pointing in the same direction. The tag end of your leader should overlap the fly line by several inches.
Here’s a tip I learned during early spring outings on cold Ontario streams: cold fingers don’t grip well. If you’re rigging streamside in chilly weather, warm your hands first or wear thin glove liners that still let you feel the materials. That pinch needs to be secure throughout the wrapping process, and numb fingers will let coils slip. Keep everything parallel and snug before you move to the wrapping stage.
Creating the Wraps
With your materials positioned and ready, you’re going to create the wraps that give the nail knot its holding power. This step requires steady hands and consistent tension, but it’s far simpler than it looks.
Start by wrapping the tag end of the leader around both the fly line and the tube one complete time. Keep this first wrap snug but not overly tight. Now continue wrapping in the same direction, moving toward the end of the fly line with each turn. Each wrap should sit neatly next to the previous one without overlapping or leaving gaps. Think of it like coiling rope, smooth and even.
You’ll make six wraps for security in total. Six turns strike the right balance between strength and bulk. Fewer wraps, say three or four, risk slippage under the strain of a heavy fish or aggressive casting. More than seven starts adding unnecessary diameter that can catch in your rod guides or create a stiff connection point. I learned this the hard way on a windy Alberta lake when a hasty four-wrap knot slipped during my backcast.
Once you’ve completed all six turns, pinch the entire coil bundle firmly between your thumb and forefinger. This pinch is critical. If you let go now, those carefully placed wraps will unravel instantly, and you’ll start over. Hold it tight while you move to the next step.
Completing and Tightening the Knot
With your six wraps pinched firmly in place, you’re ready to lock everything together. Step 7: Take the tag end of the leader, the working end you’ve been wrapping, and thread it through the straw or tube. Push it all the way through so a few inches emerge from the other side. This is where beginners sometimes rush, but take your time threading it properly.
Step 8: Here’s the critical move. While keeping your finger pressure on those coils so they don’t unravel, slowly withdraw the straw. Pull it straight out toward the fly line end. The coils should stay in place around the fly line and leader, forming a neat barrel shape. If they spring loose, don’t panic, just start the wraps over.
Step 9: Before you pull everything tight, dress the knot. Moisten the coils with water or saliva to reduce friction. Arrange the wraps so they sit snug against each other without gaps or overlaps. This lubrication step prevents heat buildup when you tighten, which protects that fly line coating.
Step 10: Now comes the satisfying part. Pull firmly on both ends of the leader, the tag end and the standing end. The coils will cinch down around the fly line with a smooth, deliberate squeeze. Keep pulling until the knot seats completely and feels solid. I still remember the first time I felt that knot lock tight on the banks of the Bow River, a small victory that meant I was actually learning this craft.
Testing Your Nail Knot: How to Know It’s Done Right
You’ve cinched the knot tight, trimmed the ends, and now you’re looking at what you hope is a solid connection. Before you thread that leader through the guides and head to the river, take a minute to verify the knot is actually going to hold. A nail knot that looks sketchy or feels loose is one you’ll regret trusting when you’re playing a trout in the Bow River.
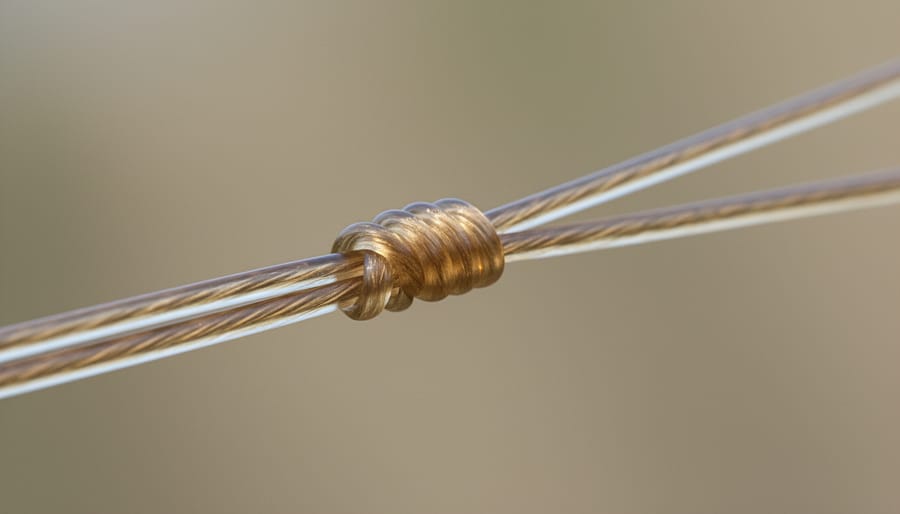
Start with a visual inspection. The wraps should sit snug against each other with no gaps or overlaps, forming a neat barrel shape around the fly line. Each coil should be tight enough that you can’t slide it with your fingernail. If the wraps look uneven, bunched up on one side, or if there’s any visible space between them, that’s a sign the knot wasn’t dressed properly before tightening. The tag ends should be trimmed close, within an eighth of an inch, so they don’t catch in your rod guides, but not so close that the knot can slip.
A properly tied nail knot will have these characteristics:
- Six uniform wraps sitting flush against the fly line with no crossing or bunching
- Smooth barrel profile that tapers slightly at each end
- No visible gaps between coils when you look closely
- Tag ends trimmed short but not flush to the knot body
- The knot feels firm and doesn’t shift when you pinch it between your fingers
Once it passes the eye test, give it a gentle pull. Grip the fly line in one hand and the leader in the other, then pull steadily, not a sharp yank, just firm, sustained pressure. The knot should hold without slipping or tightening further. If it slides at all, or if you feel the wraps shifting under your fingers, cut it off and start over. I’ve learned the hard way that a knot that feels questionable on the deck will absolutely fail when you’ve got a fish on.
If you’re not confident in the knot, maybe the wraps look a bit sloppy, or it took three attempts to get the tube out, just re-tie it. The five minutes you spend now will save you the frustration of losing your entire leader setup on a Saskatchewan lake with no backup.
Common Mistakes and How to Avoid Them
Everyone makes these mistakes when learning the nail knot, and each one teaches you something. I’ve watched beginners on the banks of the Bow River struggle with the same handful of issues, then crack them with one small adjustment.
The most common mistake is starting with kinked fly line or curly monofilament. When the materials aren’t straightened first, your wraps sit unevenly and the finished knot looks lumpy instead of smooth. Run both the fly line and leader between your fingers a few times before you start, applying gentle tension to work out the curves. Cold Canadian mornings make this harder, so warm the line in your hands if needed.
Inconsistent wrap tension causes the second most grief. If you wrap loosely at first then tighten up halfway through, those first few coils will slip when you cinch the knot. Keep steady, even pressure on all six turns, and pinch everything firmly in place before you thread the tag end through the tube.
Removing the tube too early undoes all your work. The straw holds everything aligned while you tighten, so withdraw it only after you’ve passed the tag end through and started to dress the knot. Yank it out beforehand and the wraps unravel.
Over-tightening strips the plastic coating from your fly line, sometimes removing three inches or more of the slick finish. Tighten firmly, not aggressively. You want snug coils, not a death grip that damages the line. Under-tightening creates the opposite problem: a loose knot that slips under load when you’re fighting fish. Find the middle ground where the wraps bite down cleanly without crushing the line.
Each mistake has a straightforward fix, and most beginners nail the knot by their third or fourth attempt. Understanding the complete setup from reel to leader helps you see where the nail knot fits and why precision matters. If you’re just figuring out where to start in Canada know that mastering this connection is part of the journey, not a barrier to getting on the water.
What to Do After You’ve Tied Your First Nail Knot
You’ve just tied your first nail knot, congratulations. Now comes the fun part: making it second nature.
Don’t stop at one. Tie the knot at least five more times over the next few days, even if you’re just practicing with scrap leader material and old fly line. Muscle memory matters when you’re standing waist-deep in a cold Alberta stream or rigging up at dawn on a Saskatchewan lake. The more you practice now, the less you’ll fumble when it counts.
Check your nail knot before every outing and inspect it closely a few times each season. Look for fraying near the coils, loosening wraps, or any sign the connection has shifted. If you stripped off fly line plastic during your first attempt, you know that spot is now a weak point, replace it before it fails mid-cast.
This knot is one piece of your complete fly fishing line setup. Once you’re comfortable with the nail knot, learn the improved clinch knot for tying flies to tippet and the surgeon’s knot for joining leader sections. Each connection plays a role in turning a spool of line into a working rig.
Then get out there. Ontario’s rivers, Alberta’s mountain streams, and Saskatchewan’s prairie lakes are waiting, and now you’ve got the skills to fish them properly.
Frequently Asked Questions About Nail Knots
The nail knot might seem intimidating at first, but most of the questions beginners have come down to practice, materials, and knowing when this connection makes sense for your setup.
How long does it take to learn the nail knot?
Most anglers get the hang of it after three to five practice attempts. Your first try might take ten minutes, but once the sequence clicks, you’ll tie a solid nail knot in under two minutes.
Can you tie a nail knot without a tube or straw?
Yes, experienced anglers sometimes use a nail or bodkin instead, but a hollow tube makes the process much easier for beginners because you can thread the tag end through cleanly without fumbling.
How often should you replace your nail knot connection?
Inspect it at the start of each season and after landing any large fish. If you notice fraying, loose wraps, or any damage to the fly line coating near the knot, re-tie it before your next outing.
Does the nail knot work for all fly line weights?
Absolutely. The same six-wrap technique works whether you’re rigging a 3-weight for Alberta trout streams or a 9-weight for northern pike in Saskatchewan.
When should I use backing versus leader with a nail knot?
Use the nail knot to attach backing when you’re spooling a new reel, and use it to attach a leader when your fly line has no factory loop at the tip. Both applications use the same tying method.
Will tying the knot damage my fly line?
The knot may strip off about three inches of the fly line plastic coating during tightening, which is normal. This happens at the very end of the line and doesn’t affect performance.
The beauty of the nail knot is that once you’ve tied it a few times, the muscle memory sticks with you. I’ve watched beginners struggle through their first attempt on a dock in Muskoka, then nail it perfectly the second time once they understood the rhythm of wrapping and threading. The questions above cover the hurdles most people hit, but the real answer to “Is this knot right for me?” comes down to whether your fly line has a loop already. If it doesn’t, or if you want a streamlined, permanent connection that glides through your rod guides on northern Ontario rivers, the nail knot is your go-to solution.
Don’t overthink the timing or the tools. Grab a section of old fly line, a piece of monofilament, and a drinking straw from your kitchen, then work through the steps until it feels natural. The knot won’t judge you for messy first tries, and neither will the fish.
Mastering the nail knot isn’t just about learning a technique, it’s your ticket to countless fishing adventures across Canada’s incredible waters. Whether you’re standing knee-deep in an Alberta trout stream or casting for salmon on a British Columbia river, this connection is what keeps your entire rig working together seamlessly.
Sure, your first few attempts might feel awkward. You might strip off a bit of fly line plastic or struggle to keep those six wraps tight while threading the leader through. That’s completely normal. I’ve been there, freezing my fingers on a September morning in Ontario, trying to remember which direction to wrap. But here’s the thing: each practice session makes it easier, and soon you’ll tie this knot without thinking.
The beauty of fly fishing lies in these small victories. Today it’s tying a nail knot. Tomorrow it’s landing your first fish on a rig you built yourself. That’s the journey we’re all on together, learning and improving with every cast.
Now it’s your turn. Practice this knot a few times at home, then grab your gear and head out. Canada’s rivers and lakes are waiting, and you’ve got everything you need to get started.