How to Set Up Your Fly Fishing Line from Reel to Leader
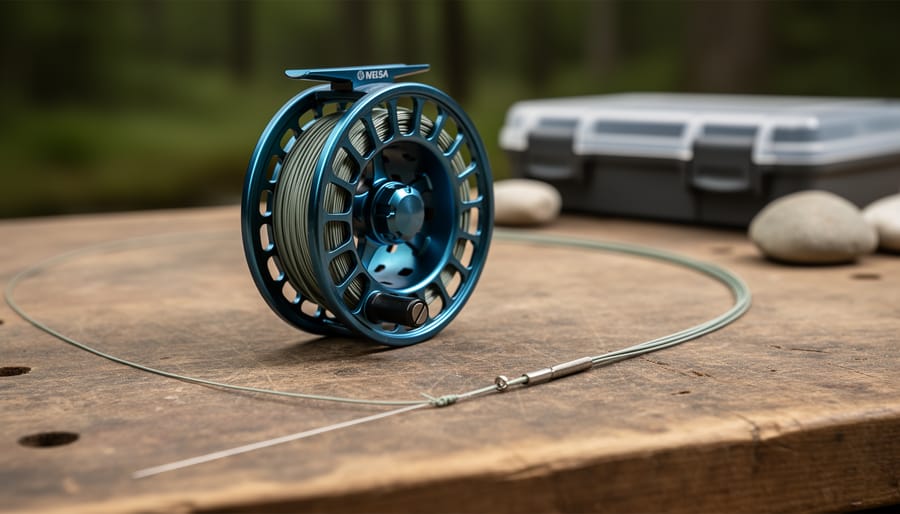
Setting up a fly fishing line correctly means connecting four distinct components in the proper sequence: backing attached to your reel, fly line joined to the backing, leader tied to the fly line, and tippet connected to the leader. This complete system takes about 15 minutes to assemble once you understand the order, and getting it right the first time means smooth casts, proper line performance, and fewer tangles on the water.
I still remember the first time I tried assembling my own line system at a buddy’s cabin north of Kenora. I had all the pieces spread across his kitchen table, backing tangled around a chair leg, and absolutely no idea which end connected to what. Three frustrating hours later, after two false starts and one accidentally cut section of brand-new fly line, I finally had something that resembled a working setup. It cast like a dream the next morning on Lake of the Woods, but I knew there had to be a simpler way.
The confusion makes sense. Unlike conventional fishing where you just spool mono onto a reel, fly fishing requires you to build a tapered delivery system where each component serves a specific function. Backing provides insurance when a big fish runs and keeps your fly line memory-free by filling the reel arbor. Your fly line carries the weight needed to load the rod. The leader creates a nearly invisible transition to your fly. And the tippet gives you the diameter and breaking strength matched to your target species.
Most anglers overthink this process. You don’t need an engineering degree or a specialty tool kit. You need the right components for your rod weight, a basic understanding of what connects to what, and about a quarter-hour of focused attention. Get the sequence right, and you’ll be casting confidently instead of troubleshooting tangles streamside.
What You’ll Need for a Complete Fly Line Setup
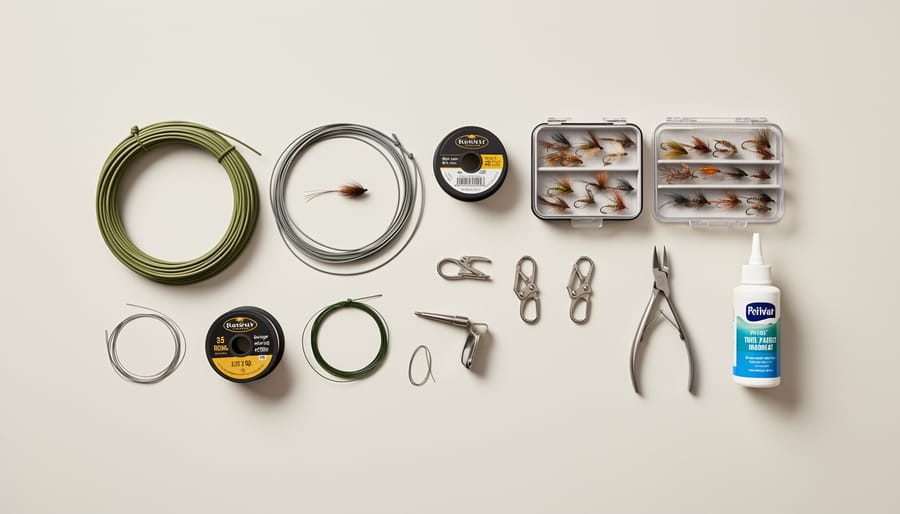
Before you thread your first cast across a glassy Canadian river, you need to gather the right components and understand what each one does. I learned this the hard way on my first attempt at assembling a fly fishing rig, I stood in my garage with a tangle of line and no clear idea which piece connected where. Let me save you that frustration with a straightforward inventory of what you’ll actually need.
Your complete fly line setup consists of four primary components working together as a system. Start with your fly reel, which stores everything and manages your line as you cast and retrieve. Next comes backing line, a long, thin braided line (typically 20-lb or 30-lb test) that connects your reel to the main fly line. The backing does more than just fill space; it increases your reel’s arbor diameter, which reduces line memory and gives you extra length when a big fish makes a run. I’ve been grateful for that extra backing more than once on Saskatchewan pike waters.
Your fly line is the weighted core of the system, the component that actually carries your fly to the fish. This line comes with specific designations that tell you its taper type, weight, and buoyancy, we’ll decode those numbers in the next section. Finally, you need a leader, which is the nearly invisible section that connects your fly line to your fly. The leader tapers down to a fine diameter so fish don’t see the connection.
Here’s your complete gear checklist before you begin:
- Fly reel (matched to your rod weight)
- Backing line: 20-lb or 30-lb test braided, 50-100 yards depending on target species
- Fly line with proper weight designation for your rod
- Tapered leader (usually 7.5 to 9 feet for freshwater)
- Small scissors or nippers for trimming line
- Clean workspace with good lighting
You don’t need specialized tools for basic assembly. A pair of small scissors or fishing nippers will handle any trimming, and a clear table or workbench gives you room to lay everything out without tangles. Some anglers keep a damp cloth handy to wipe down components as they work, which helps you spot any nicks or damage before threading the system together.
The beauty of this checklist is its simplicity. Once you have these components, you’re ready to build a complete setup that’ll serve you from spring brook trout streams to fall salmon runs across Canada.
Understanding Fly Line Designations Before You Buy
Walking into a fishing shop and staring at rows of fly lines can feel like decoding a foreign language. Those cryptic letters and numbers stamped on every package actually tell you everything you need to know, once you understand the system.
Every fly line uses a three-part designation that describes its taper type, weight, and buoyancy. Take “WF3F” as an example. The first part, “WF,” stands for Weight Forward, which means most of the line’s mass sits near the front end. This design helps you load your rod quickly and cast farther, making it the most popular taper for general fishing. You’ll also see “DT” for Double Taper (mass distributed evenly for delicate presentations) and “ST” for Shooting Taper (designed for maximum distance).
The middle number indicates line weight, which matches your rod. A 3-weight line pairs with a 3-weight rod, a 6-weight with a 6-weight rod, and so on. This number reflects how much the first 30 feet of line weighs, standardized across manufacturers. Lighter weights (2-4) suit small streams and delicate dry flies. Mid-weights (5-7) handle most situations Canadian anglers encounter. Heavier weights (8-12) tackle big rivers, pike, or saltwater species.
The final letter tells you about buoyancy. “F” means floating, the workhorse for most trout fishing. “S” indicates sinking, useful when fish hold deep. You’ll also see “I” for intermediate (slow sink) and combinations like “F/S” for sink-tip lines.
When you match these designations to a balanced system, everything works together. A 5-weight rod wants a 5-weight line and typically pairs with leaders in the 4X-6X range. Mismatch these elements and your casts fall apart, too heavy and you overpower delicate presentations, too light and you can’t load the rod properly.
Pricing varies widely across Canadian retailers, from around $15 for basic lines to $100 or more for premium models. What drives the cost difference? Coating technology that reduces friction and improves floatation, durability for multiple seasons, specialized tapers for niche techniques, and smoother handling in cold water. A mid-range line around $40-$60 serves most anglers well for years.
Understanding these designations before you shop means you’ll walk out with exactly what your fishing style demands, not just what sounds impressive on the package.
Matching Your Line Weight to a Balanced System
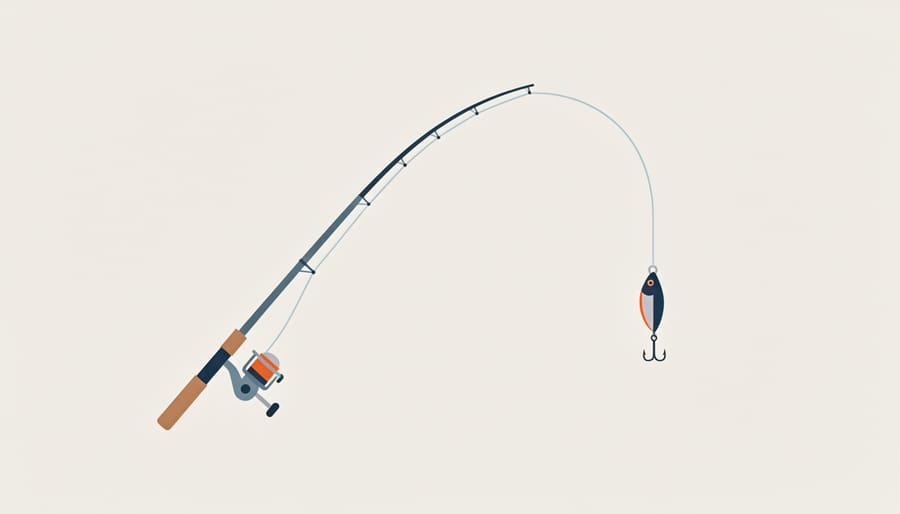
When I started fly fishing, I learned quickly that buying random components leads to frustration. A 7-weight line paired with a 4-weight rod feels like trying to cast a rope with a toothpick. Balance matters more than any single piece of expensive gear.
Think of your fly fishing system as a matched set where every component works in harmony. Your rod has a weight rating (commonly 4, 5, 6, or 7 for most Canadian freshwater fishing), and your fly line weight must match that number exactly. A 5-weight rod needs 5-weight line, period. This isn’t a guideline, it’s how the system functions. The rod flexes properly only when loaded with the correct line weight, which determines your casting accuracy and distance.
But balance extends beyond just matched rod and reel. Your leader plays a crucial role too. Leaders are rated on an X-scale from 7X (the finest) down to 0X (the strongest), with strength values ranging from delicate 2-pound test up to about 20 pounds. For a balanced 5-weight setup chasing Ontario trout, you’d typically use 4X or 5X leaders. Heavier lines (6 or 7-weight) pair with stouter leaders like 2X or 1X when you’re targeting bigger species like pike or bass.
What happens when things don’t match? An underweighted line won’t load your rod properly, resulting in weak, inaccurate casts that collapse before reaching your target. Overweight your setup and you’ll overload the rod, losing the delicate presentation needed for spooky fish. Mismatched leaders create similar problems, too light and you’ll break off on strikes, too heavy and your fly lands like a brick.
The good news is manufacturers design systems around these weight classes for a reason. Start with your rod weight, match your line to it, and choose leaders appropriate for your target species. Everything else flows from there.
Before You Start: Setup Conditions and Common Mistakes
Before you thread your first piece of backing, take a minute to set yourself up for success. I learned this the hard way on a windy morning in Alberta, wrestling with tangled line while my fishing buddies were already casting to rising trout. Find a clear, flat workspace, a clean garage floor or picnic table works perfectly, and lay out all your components where you can see them. Good lighting matters more than you’d think when you’re working with thin monofilament leaders and checking for wear.
Check your fly line for cracks, nicks, or rough spots before you start spooling. Run it through your fingers gently, feeling for anything that doesn’t seem smooth. These imperfections will only get worse once you’re fishing, and they’ll catch in your rod guides at exactly the wrong moment. Make sure your reel is properly mounted to your rod with the handle on your preferred side and the foot seated firmly in the reel seat. A loose reel mid-cast is embarrassing at best and dangerous at worst.
The most common errors I see from people new to fly fishing for beginners involve rushing through connections or winding the line backward on the reel. Take your time with each attachment point. It’s easier to get it right the first time than to unspool everything and start over when you’re standing knee-deep in a stream.
Step-by-Step: Building Your Fly Line Setup
Step 1: Attach Backing to Your Reel
Start at your reel’s arbor, the central spool where everything begins. Thread your backing through one of the reel’s ventilation holes or tie it directly around the arbor using a secure attachment method. Pull it snug, but don’t overtighten to the point where you’re stressing the spool. This initial connection matters more than you’d think; I learned that on Ontario’s Grand River when a backing failure let a steelhead take my entire line into the current.
Backing serves two crucial purposes. First, it increases your arbor diameter, which reduces the coil memory that causes fly line to kink and tangle. Second, it provides line capacity when you hook something that runs hard and fast, pike, salmon, or even a large brown trout in cold water.
How much backing should you add? For most freshwater applications in Canada, 50 to 100 yards of 20-lb test braided backing is plenty. If you’re targeting larger species like lake trout or steelhead, consider 30-lb test and closer to 150 yards. Check your reel’s capacity rating to avoid overfilling, you should leave enough room for your fly line to spool on top without crowding the frame.
Wind the backing evenly across the arbor with steady tension. Keep light pressure with your free hand as you turn the reel handle. Uneven winding now creates problems later.
Step 2: Connect Backing to Fly Line
Once your backing is securely attached to the reel arbor, the next critical junction is joining that backing to your fly line. This connection bears the full load when a fish makes a powerful run, so it needs to be both strong and smooth enough to pass through your rod guides without snagging.
Before you make this connection, lay out about six feet of backing and the same length from the end of your fly line. Inspect both ends carefully, look for fraying on the backing or any cracks in the fly line coating that might weaken the join. The backing should feel tight and uniform in texture, while the fly line end should be clean and undamaged.
The connection itself should be firm enough that you can’t pull it apart with steady hand pressure, but not so tight that it creates a bulky lump. Many anglers overthink this step, but the goal is simple: create a junction that won’t fail under fighting tension and won’t hang up when line runs out through your guides during a long cast or when a big northern pike decides to test your entire system.
Test your connection by pulling steadily with both hands about a foot apart. It should hold without slipping. If it feels loose or the materials slide against each other, redo it before spooling. A failed connection on the water means lost fish and frustration, five minutes of careful work now saves hours of headache later.
Step 3: Spool Your Fly Line
With your backing secure and connected to your fly line, you’re ready to load everything onto the reel. This step seems straightforward, but winding your line incorrectly creates memory coils and tangles that’ll haunt you for months.
First, check which way your line comes off the spool. Most fly line manufacturers package their line so it should feed directly onto your reel without twisting, the line should come off the top of the spool and wind onto the top of your reel in the same direction. If you’re unsure, pull off a few feet and watch how it wants to lie naturally. Fighting against the line’s memory is a losing battle.
Thread your backing through the rod guides from reel to tip, then pull it back down to give yourself working length. This keeps everything aligned as you wind. Now comes the critical part: maintaining consistent tension. I learned this the hard way on the Bow River when my loosely-spooled line turned into a bird’s nest on my first cast.
Hold the line between your thumb and forefinger as you crank the reel, applying steady pressure, firm enough to feel resistance, but not so tight you’re straining. Too loose and your line develops soft spots that’ll bunch up later. Too tight and you risk damaging the line coating or overloading your reel.
Wind slowly and watch the line distribute evenly across the spool. If it starts piling up on one side, guide it with your free hand while maintaining that crucial tension.
Step 4: Attach Leader to Fly Line
The final connection, leader to fly line, deserves your full attention because it’s the transition point where your entire setup meets the water. This join needs to be strong enough to handle fish but slim enough to flow smoothly through your rod guides on every cast.
Look at the tip of your fly line. It should have a small loop or welded end specifically designed for leader attachment. If your line doesn’t have a built-in loop, you’ll need to create one using the manufacturer’s instructions or consult your local fly shop for guidance. The leader, typically starting at a thicker diameter that matches your line weight, connects at this point.
When making this connection, hold both pieces up to the light and check the join carefully. You’re looking for a smooth, gradual taper with no bulky knots or rough edges that could snag in your guides mid-cast. Run your fingers along the connection point, it should feel like a gentle transition, not a hard bump.
I learned this lesson the hard way on a Saskatchewan pike trip near Tobin Lake. My hastily assembled connection created a bump that caught in the top guide just as a massive pike surged. The pause was enough for the fish to throw the hook. Since then, I test every leader connection by threading it through my rod guides before I ever make a cast.
Pull-test your connection gently but firmly. It should hold without slipping or showing gaps. If something feels off, redo it now rather than discovering the problem with a fish on the line.
Testing Your Setup Before You Hit the Water
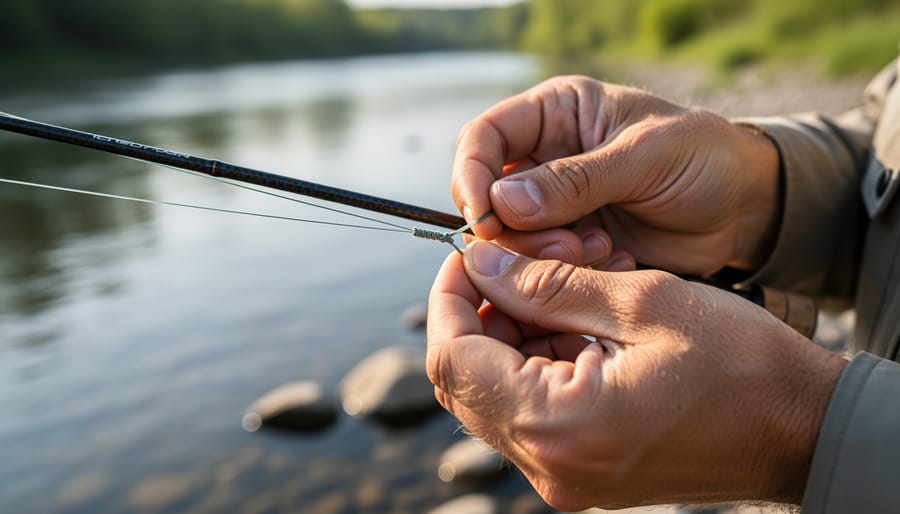
Before you pack your gear and head out to that promising creek or lake, take fifteen minutes to verify your setup is ready for action. I learned this lesson the hard way on a Georgian Bay outing when a weak connection let a beautiful smallmouth swim away with my fly still in its mouth. A quick check in your backyard can save you frustration and lost gear on the water.
Start with a visual inspection of every connection point. Look closely where your backing meets the reel arbor, where backing joins your fly line, and where the leader attaches to the line tip. Each connection should sit flush and tight without gaps or loose loops. Run your fingers along these joins, you shouldn’t feel any bumps or irregularities that could catch on your rod guides.
Next, perform a simple pull test. Grab the backing near the reel and pull firmly with steady pressure, not a sudden yank. The connection should hold without slipping. Do the same test at the backing-to-fly-line junction and the leader connection. You’re looking for solid holds that don’t budge under tension similar to what a fighting fish creates.
Now it’s time for practice casts in your yard or a park. Strip out about twenty feet of line and make some basic casts. Watch how the line flows through your guides. It should move smoothly without catching or hesitating. Listen too, you shouldn’t hear clicking or scraping sounds as the line passes through.
- Inspect all connection points visually for gaps or loose spots
- Pull test each connection with firm, steady pressure
- Strip line through guides checking for smooth movement
- Make practice casts watching for tangles or catches
- Check reel drag adjustment and test retrieval smoothness
Pay attention to how your reel performs during these test casts. The drag should engage smoothly when you strip line out, and retrieval should feel even without jerky spots. If your line twists during casting or you notice kinks forming, you may have spooled it incorrectly, better to fix that now than streamside.
Watch for warning signs that need immediate attention. If any connection slips during your pull test, redo it completely. Rough spots or fraying at junction points mean you need to trim and reconnect. Tangles that form during practice casts often indicate your line wasn’t loaded with proper tension.
Finding a problem isn’t a setback, it’s exactly why you’re testing. Most issues take just minutes to fix at home with all your materials handy. Once everything checks out and you’re casting smoothly in your yard, you’re ready for the real adventure on Canadian waters with confidence your setup won’t let you down.
Common Questions About Fly Line Setup
Setting up your fly line system raises questions that don’t always get answered in step-by-step guides. These are the ones I hear most often from anglers assembling their first setup or upgrading their gear, questions I’ve wrestled with myself on lakes from Ontario to British Columbia.
How often should I replace my fly line and backing?
Replace your fly line when you notice cracks in the coating, when it no longer floats properly (for floating lines), or when the color fades significantly, typically every 2-3 seasons of regular use. Backing lasts much longer and usually only needs replacement if you see fraying or if it’s been soaked in saltwater without proper rinsing.
Can I use any backing with any fly line?
Yes, backing is universal, 20-lb or 30-lb test braided backing works with any fly line regardless of weight or taper. The key is matching your backing quantity to your reel’s capacity and the size of fish you’re targeting, not to the specific fly line designation.
What’s different about saltwater fly line setups?
Saltwater setups use the same basic assembly sequence but require components built to resist corrosion, look for backing and lines explicitly rated for saltwater. You’ll also typically use heavier line weights (8-12 weight range) and stronger leaders compared to most Canadian freshwater applications.
How do I know if my system is actually balanced?
A balanced system means your rod weight, line weight, and leader size work together without fighting each other. If your 5-weight rod is matched with 5-weight line (like a WF5F designation) and an appropriately sized leader for your target species, you’ll feel smooth energy transfer during the cast, no whipping at the tip or dead spots in the flex.
The backing question deserves extra attention because it trips up newcomers. You’re not matching backing to line designation, you’re matching quantity to fish behavior. Chasing smallmouth bass on a small river? You might only need 50 yards of 20-lb backing. Going after lake trout in deep water or salmon that make long runs? Load up 150-200 yards of 30-lb backing to handle those powerful sprints.
Component lifespan varies wildly based on how you fish and where you store your gear. I’ve seen fly lines deteriorate in a single season when left on a reel in a hot garage, and I’ve fished backing that was ten years old without issue because it rarely saw heavy use. Inspect your setup at the start of each season, stretch out your line, check the backing where it connects to the fly line, and look for any weak spots that developed over winter.
The saltwater versus freshwater distinction matters more for durability than function. If you’re fishing exclusively in Canadian lakes and rivers, standard freshwater-rated components will serve you well. The assembly process stays identical whether you’re rigging for trout in Alberta streams or pike in Saskatchewan lakes. The difference between fly fishing vs regular fishing becomes obvious when you realize how the balanced system concept, rod, line, and leader working as one unit, creates the delicate presentations that make fly fishing so effective.
Balance isn’t just theory. When your system is properly matched, you’ll feel it in your casting rhythm. The line loads the rod smoothly, transfers energy efficiently, and turns over your leader without collapsing. An unbalanced setup forces you to work harder, produces inconsistent casts, and frustrates both you and the fish you’re trying to reach.
What Comes Next: Maintaining Your Line Setup
Your line setup is complete, but the work doesn’t stop when you head to the water. I learned this lesson on a May morning in Alberta, threading my rod only to discover my backing connection had loosened over the winter. Twenty minutes of re-rigging later, I made a promise to myself about regular maintenance.
Check your connections before every trip, especially the backing-to-fly-line junction and leader attachment. A quick tug test takes five seconds and can save you from losing that trophy trout. After each outing, wipe down your fly line with a damp cloth to remove dirt and debris that causes cracking. Once a month during active season, pull all your line off the reel and inspect for nicks, memory coils, or worn spots.
Canadian seasons demand special attention. Before storing your gear for winter, clean everything thoroughly and loosen your drag to prevent spring compression. When April arrives and ice-off approaches, re-check all connections before your first cast. Temperature swings affect line memory and connection tightness, so what felt secure in November might need adjustment in spring.
The real beauty of maintaining your setup is the confidence it builds. When you know your system is solid, you stop worrying about equipment and start focusing on reading the water, presentation, and technique. That mental shift transforms your fishing. If you’re wondering where to start in Canada with your newly assembled outfit, you’ve got thousands of streams, rivers, and lakes waiting for you to explore them with a setup you trust completely.
Setting up your fly fishing line might feel like learning a new language at first, all those designations, components, and connections can seem overwhelming when you’re just trying to get out on the water. But here’s the truth I’ve learned from years of rigging up along Canadian streams: once you’ve built that complete system from backing to leader even a few times, it becomes second nature. Your hands remember the sequence, and what once took an hour of puzzled concentration becomes a ten-minute routine you can do without thinking.
That foundational skill you’ve just learned opens up every trout stream in the Rockies, every pike lake in Saskatchewan, every salmon river in the Maritimes. A properly balanced setup, whether it’s a delicate 4-weight for spring creeks or a robust 7-weight for coastal steelhead, gives you the confidence to focus on reading water and perfecting your cast instead of worrying whether your connections will hold when a fish runs hard.
I still remember the satisfaction of landing my first decent rainbow on a rig I’d assembled myself, knowing that every connection I’d made held firm through the fight. That same satisfaction is waiting for you on Canadian waters.
If you want more practical fishing guidance like this, gear advice, technique breakdowns, and regional tips from anglers who actually fish these waters, sign up for our newsletter. We’ll help you make the most of every fishing opportunity this country offers.