How to Set Up Your Fly Fishing Line: A Complete Step-by-Step System
Standing waist-deep in a northern Ontario stream last spring, I watched a newcomer struggle with a tangled mess of line, leader, and tippet for twenty minutes before giving up and heading home. That frustration is avoidable. Setting up a fly fishing line takes about 15 minutes when you know the proper sequence: attach backing to your reel, connect the fly line with a nail knot, add a tapered leader, extend it with tippet, and tie on your fly. Master these five connections and you’ll spend your time casting instead of cursing.
The biggest hurdle isn’t the physical assembly but understanding what goes where and why. Unlike spin fishing where everything threads through guides in one direction, fly fishing requires building a graduated system that transfers energy smoothly from thick fly line down to nearly invisible tippet. Get the order wrong or skip a component and you’ll either snap off flies on every cast or watch your line land in a heap three meters from your boots.
The terminology trips people up too. That confusing X-rating system on leaders and tippets? It’s backwards from what you’d expect. A 5X tippet is thinner than 3X, ranging from 0X at the thick end down to 8X for the finest presentations. The taper in your leader follows a 60/20/20 ratio, meaning 60 percent thick butt section, 20 percent transition zone, and 20 percent thin tip. This graduated design is what lets you turn over a dry fly with precision instead of slapping it on the water like a beaver tail.
What You’ll Need for Your Line Setup
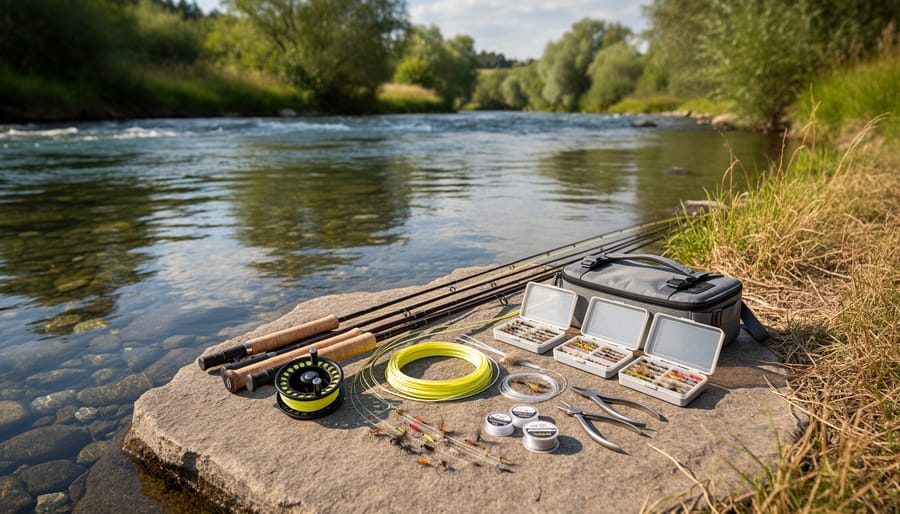
Before you start threading line and tying knots, gather everything you need in one spot. I learned this the hard way on my first solo setup attempt at a Winnipeg fly shop, when I had to sprint back inside three times for forgotten items while the staff tried not to laugh. Trust me, having your complete gear checklist ready saves frustration and keeps your focus where it belongs.
Here’s what belongs on your workspace:
- Backing line, typically 20-pound test Dacron, enough to fill your reel arbor with 50 to 150 yards
- Fly line matched to your rod weight, such as a weight-forward floating line in the 4 to 6 weight range
- Tapered leader, usually 7.5 to 9 feet long, rated in the X-system from 0X to 8X
- Tippet material in 5X and 6X diameters for building extensions
- A selection of flies appropriate to your target species and local conditions
- Sharp nippers or line cutters for clean, precise cuts
- Forceps or hemostats for removing hooks and tightening knots
- Nail knot tool, optional but helpful for beginners
The X-rating system confuses almost everyone starting out with fly fishing for beginners. Here’s the simple version: tippet material is measured in Xs, like 3X, 4X, or 5X. For tapered leaders, the X tells you the diameter of the narrowest part of the leader. The range runs from 0X to 8X, and here’s the counterintuitive bit that trips people up: the larger the X number, the smaller the tippet diameter. So 6X is thinner and more delicate than 5X, which is thinner than 4X. I still remember standing in a Canmore tackle shop staring at tippet spools, wondering why everything seemed backwards.
Most tackle shops across Canada stock these components year-round, and staff are usually happy to help you match everything to your matched rod and reel. If you’re setting up a 5-weight outfit, for instance, you’ll pair 5-weight fly line with a tapered leader, then add that 12 to 18 inches of 5X or 6X tippet before attaching your fly. The beauty of this system is that once you understand the basics, the components work together predictably every time.
Understanding Leaders and Tippets Before You Start
I’ll be honest: the first time I stood on the shore of a northern Ontario lake with a brand-new tapered leader in my hands, I had no clue what “5X” meant. Was it better than 4X? Stronger? The package didn’t explain much, and I spent the first hour of what should have been prime fishing time trying to decode the system. Let me save you that frustration.
The X-rating system is simpler than it looks once you grasp the fundamental rule. Tippet material is measured in Xs, 3X, 4X, 5X, and so on, and for tapered leaders, that X number tells you the diameter of the narrowest part of the leader. Leaders range from 0X (thick) all the way down to 8X (hair-thin). Here’s the counterintuitive part that trips up most beginners: the larger the X number, the smaller the tippet diameter.
That inverse relationship matters because you’ll match your tippet to your fly size and the wariness of the fish you’re targeting. A 3X setup works well for larger streamers and aggressive species, while a 6X might be necessary for spooky trout sipping tiny mayflies in clear water.
Now, about that 60/20/20 ratio you’ll see mentioned everywhere: most all tapered leaders are built based on this proportion. The butt section (closest to your fly line) makes up 60 percent of the leader’s length, the midsection is 20 percent, and the tippet section accounts for the final 20 percent. This gradual taper is what allows energy to transfer smoothly from your thick fly line down to the delicate tippet, giving you clean turnover and a natural fly presentation.
When you purchase a tapered leader, plan to add 12 to 18 inches of 5X or 6X tippet back to the leader before tying on your fly. This extension lets you change flies repeatedly without shortening the expensive tapered section, and it fine-tunes your presentation. Once I learned to build out that tippet section properly on that Ontario trip, everything clicked.
Safety and Preparation Notes
Before you start threading line and tying knots, take a moment to set yourself up for success and avoid unnecessary injuries. I learned this the hard way after a fly hook buried itself in my thumb during a rushed assembly session at the truck tailgate.
Handle your nippers and cutting tools with care, especially when trimming tag ends close to knots. A slip can puncture skin or damage your expensive fly line. Keep hooks secured in their packaging or a fly box until you’re ready to tie them on, and never leave loose flies sitting on your lap or work surface.
Working in good lighting makes a massive difference, particularly when you’re dealing with fine tippet material that nearly disappears in dim conditions. I always organize my components before I begin: backing, fly line, leader, tippet spools, flies, and tools laid out in the order I’ll need them. This prevents the frustrating scramble for nippers while you’re holding a half-finished nail knot with your teeth.
If you’re setting up near water, watch your footing on slippery rocks or boat decks. A tumble with sharp tools in hand can turn a simple rigging session into a trip to the clinic. Take your time, work methodically, and remember that a properly assembled system is worth the extra few minutes of careful preparation.
Step-by-Step: Assembling Your Fly Fishing Line
Attaching Backing to Your Reel
Start by threading the backing line through your reel and wrapping it around the arbor, that’s the central spindle where everything begins. You’ll use an arbor knot to lock it in place: wrap the backing around the arbor, tie an overhand knot around the main line, then tie a second overhand knot at the tag end to create a stopper. Pull tight and trim the excess. The knot cinches down against the arbor and won’t slip, even under heavy pressure.
How much backing should you load? For most trout setups, 100 yards is plenty. If you’re chasing larger species in Canadian waters, pike that make blistering runs across northern lakes or salmon that strip line downstream, consider bumping up to 150 or even 200 yards. I learned this the hard way on the Bow River when a chunky rainbow took me into my backing three times in one fight. Better to have extra capacity than watch your fly line disappear with no cushion behind it.
Wind the backing evenly across the spool, keeping light tension as you go. This prevents loose coils that tangle later and ensures you’re maximizing your reel’s capacity for those heart-pounding moments when a fish decides to test your entire system.
Connecting Fly Line to Backing
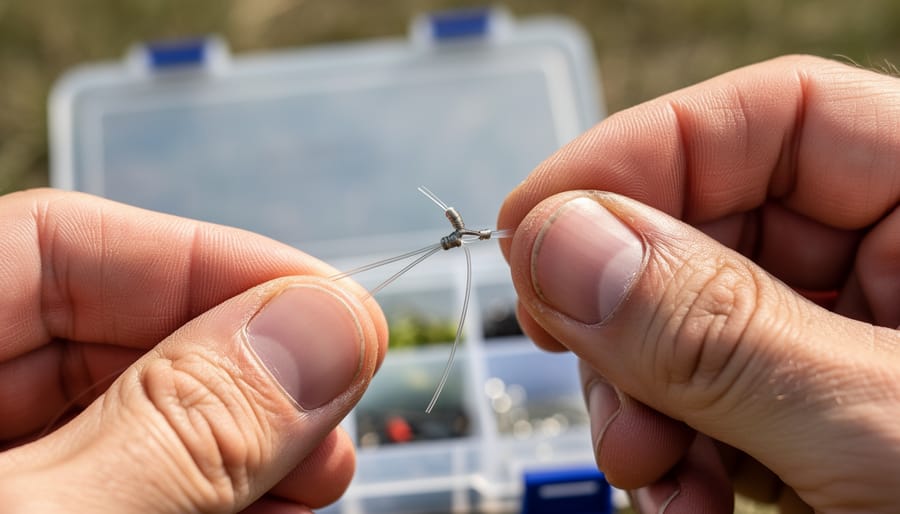
This connection carries every ounce of pressure when a fish makes a run, so it needs to hold. I learned that lesson the hard way one September morning on the Bow River when a rainbow tested my hastily tied knot and won.
The nail knot is your gold standard for joining fly line to backing when you don’t have pre-installed loops. It creates a slim, strong connection that slides smoothly through your rod guides without catching. Here’s how to tie it:
Lay the end of your fly line alongside your backing line, with about six inches of overlap. Take the tag end of the backing and make five to seven tight wraps around both the fly line and a nail or tube (this keeps the center open). Thread the tag end back through the tunnel you created, carefully remove the nail, and pull both ends to tighten the wraps. Trim the excess close.
Your first few attempts might look messy. That’s normal. I sat at my tying bench for an hour before my first decent nail knot held. A nail knot tool from Canadian Tire or your local tackle shop makes the process easier until muscle memory kicks in.
If your fly line came with a welded loop at the butt end, you can skip the nail knot entirely. Just tie a loop in your backing with a surgeon’s loop or perfection loop, then connect the two loops with a simple loop-to-loop join. Pull it snug and you’re done in thirty seconds.
Either way, give it a firm tug before spooling. This joint is your insurance policy against the fish of a lifetime.
Adding Your Tapered Leader
With your backing connected to your fly line, you’re ready to add the tapered leader. Most modern fly lines come with a welded loop at the tip, making this step straightforward. If your line has a loop and your leader has a loop, use the loop-to-loop connection: pass the leader loop through the fly line loop, then thread the entire leader back through its own loop and pull snug. It takes seconds and holds remarkably well. If you don’t have loops, you’ll need a nail knot to join the leader butt to the fly line tip, just like you did with the backing.
Leader length typically ranges from seven and a half to nine feet, but here’s where conditions come into play. On a calm northern Ontario lake, a nine-foot leader turns over beautifully. In windy prairie conditions or when working heavy streamers, I’ll often cut mine back to seven feet for better casting control. Remember that 60/20/20 construction we discussed earlier? You can shorten from the thick butt section without ruining the taper’s effectiveness. Just know that once you tie on your fly, you’ll want to add 12 to 18 inches of fresh tippet back to that shortened leader to preserve its action and give yourself room for fly changes.
Building Out Your Tippet Section
Here’s the thing most new anglers miss: that tippet extension you add to your leader isn’t optional. After you’ve attached your tapered leader and possibly shortened it a bit, you need to build it back out with 12 to 18 inches of fresh tippet material before tying on your fly. I learned this the hard way on Lake Nipissing, burning through a $15 leader in one afternoon because I kept tying flies directly to the tapered section.
Start with either 5X or 6X tippet, depending on your target species and fly size. The 5X offers a bit more strength and works well for general trout fishing and larger dry flies, while 6X gives you finer presentation for selective fish or smaller patterns. Use a double surgeon’s knot or blood knot to connect the tippet to your leader’s thin end. This extension serves two purposes: it protects your expensive tapered leader from constant retying, and it maintains that critical taper for proper fly turnover.
When the tippet gets short from changing flies, just snip it off and tie on a fresh section. Your leader stays intact, you save money, and your casts keep turning over smoothly. Most days I carry both 5X and 6X spools so I can adjust on the water based on what the fish are telling me.
Tying On Your Fly
With your tippet in place, thread the end through the eye of your fly and tie an improved clinch knot: wrap the tag end around the standing line five or six times, pass it back through the loop by the eye, then through the larger loop you just created, and pull tight. I learned this lesson the hard way when a beautiful brook trout in Algonquin snapped free mid-fight, my knot had slipped because I rushed it. Now I always moisten the knot with a bit of water before cinching down, and I give it a firm tug to test the hold. Wiggle the fly gently; it should move freely without the knot binding or twisting awkwardly. A solid connection here is your last line of defense between you and the fish.
Testing Your Setup and Making Adjustments
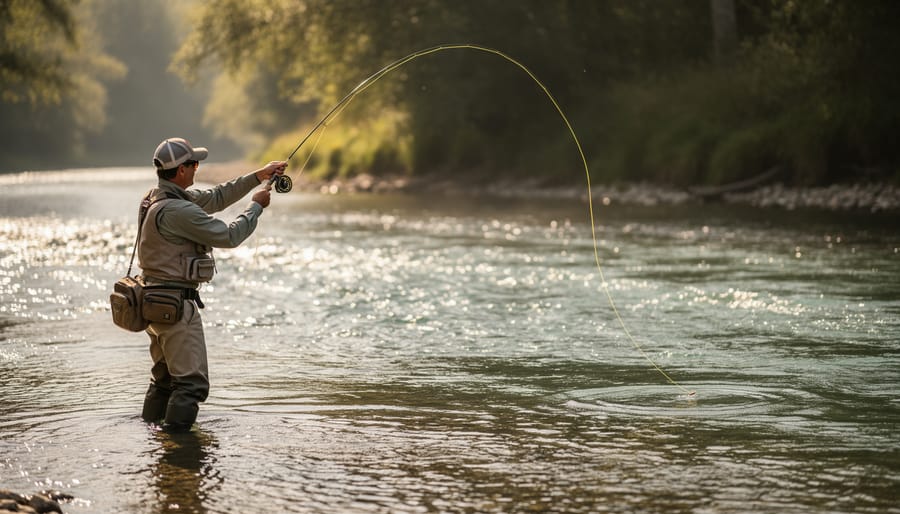
Before you head to the water, take ten minutes to verify your setup, it’ll save you from lost fish and frustrating tangles when a big trout finally rises. I learned this the hard way on Lake Nipissing, when I rushed through assembly in fading light and spent my first hour retying connections instead of fishing.
Start by inspecting every knot connection from backing to fly. Run your fingers along each junction point, the arbor knot at your reel, the connection between backing and fly line, the leader attachment, and the tippet-to-fly knot. They should feel smooth and tight, with no loose tag ends or gaps. Give each connection a gentle pull test: hold the line on both sides of the knot and apply steady pressure, gradually increasing until you’re pulling firmly but not yanking. A properly tied knot won’t slip or show any weakness at this stage.
- All knots are tight with trimmed tag ends
- Gentle pull test shows no slipping at connections
- Leader unrolls smoothly without memory coils
- Tippet section measures 12 to 18 inches
- Fly hangs straight from the tippet without twisting
Next, make a few practice casts in an open area, your backyard or a quiet shoreline works perfectly. Watch how the line turns over: it should unfurl smoothly in a single motion, with the leader extending straight and the fly landing gently. If your setup collapses in a heap or the leader fails to straighten, you likely need adjustments. A leader that won’t turn over might be too light for your line weight, while one that slaps down hard could benefit from an extra foot of tippet to soften the presentation. If you’re working with sink tip fly lines for deeper water, the turnover should still follow this same smooth pattern despite the denser tip section.
Check for tangles by stripping line out and letting it fall naturally. Wind knots in your leader, those tiny overhand knots that appear seemingly on their own, signal casting problems or a setup that’s fighting itself. If you spot them repeatedly, try adding a bit more tippet or switching to a slightly heavier tippet diameter. The 60/20/20 ratio in your tapered leader handles most situations, but conditions sometimes demand tweaks.
Your setup will tell you when it needs attention: weak hooksets suggest a slipping knot, while constant tangles often mean your tippet section is too short or your leader has developed memory coils from storage. After that Nipissing experience, I always do this verification ritual before the first cast, and my time on the water has been infinitely better for it.
Common Questions About Fly Line Setup
I still remember the first time I assembled my line setup on my own, I must have tied and re-tied that nail knot five times before heading to the water, second-guessing every connection. Over the years, I’ve fielded dozens of questions from fellow anglers at the dock, and these are the ones that come up most often.
How often should I replace my tippet?
Replace tippet after every few outings or whenever you notice fraying, wind knots, or reduced diameter from repeated fly changes. I swap mine out completely at the start of each season and carry spare spools for mid-day replacements when I’m working through trout techniques that require frequent fly swaps.
Can I reuse tapered leaders?
Absolutely, quality tapered leaders can last multiple seasons if you maintain them properly. When the tippet end gets short from changing flies, just add 12 to 18 inches of fresh 5X or 6X tippet back to the leader before tying on your fly, which restores function and extends the leader’s life.
What if my tapered leader is too short after I’ve trimmed it down?
This happens to everyone eventually. Either retire it and start fresh with a new leader, or if there’s still decent length in the butt section, add a longer tippet extension (18 to 24 inches) to compensate, it won’t turn over quite as perfectly, but it works in a pinch.
How do I know if my knot connections are strong enough?
Give each connection a firm, steady pull before you head out, not a sudden yank, but enough tension to simulate a good fish. If the knot slips or breaks, re-tie it; a properly seated nail knot or loop connection should hold under significant pressure without budging.
One question I hear constantly is whether you need different setups for different species. The honest answer is that your basic setup works across most Canadian freshwater fishing, but you’ll adjust components based on conditions. Chasing aggressive pike might mean stepping up to a heavier tippet, while delicate dry fly presentations for selective fish often call for lighter 6X material. The beauty of understanding the X-rating system, where larger numbers mean smaller diameter, is that you can fine-tune your setup on the water without overhauling the entire rig. I keep a few spare leaders and tippet spools in my vest for exactly this reason, swapping out the terminal end rather than starting from scratch every time conditions change.
Your Next Steps on the Water
You’ve just assembled a complete fly fishing system from scratch. That’s no small feat, and you should feel confident heading to the water with a properly rigged setup that will handle whatever Canadian waters throw at you.
Before you chase that trophy trout or northern pike, spend an hour in an open field or quiet shoreline practicing your casting. Get a feel for how the line loads, how the leader turns over, and how smoothly your connections flow through the guides. This low-pressure practice will save you frustration when you’re standing knee-deep in a promising run.
I still remember the first time I rigged my own setup correctly. After months of tangled leaders and lost fish, watching that line straighten out perfectly felt like unlocking a secret. I’m still learning new tricks every season, whether it’s reading insect hatches on Ontario streams or adapting my tippet choices for different water clarity.
Once you’re comfortable with your rig, the real adventure begins: choosing the right flies for your target species, learning to read where fish hold in different currents, and discovering the regional techniques that work in your home waters. Each outing will teach you something new about adjusting your setup for conditions.
I’d love to hear about your experiences as you put this knowledge to work. Share your successes, your questions, and your favorite Canadian fishing spots through our newsletter. Tight lines out there.